 We have put together some helpful instructions and tips to make the removal and fitment of the Kuhner 85 Amp alternator that much easier. This alternator fits a selection of the Hilux Pickup models from 2002 onwards and Land Cruiser KDJ90/95, 120 series, and 150 series. See the ‘Compatible Vehicles’ tab on the product page on our website for the complete list.
This particular alternator is made by Kuhner. Based in Italy, they are one of the most established manufacturers and distributors in Europe and form part of the DAS Europe Group.
| How to remove your existing Alternator on a KUN25/KUN26 Hilux Pickup:
Disconnect the battery - Negative first (make sure you have your stereo activation codes if all power is lost). |
|
| Remove the air flow sensor connector, then the air box via the two bolts which are 12mm spanner size. | 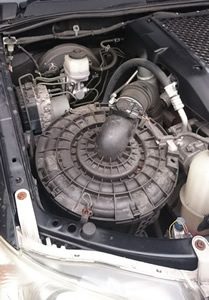 |
| Remove the air intake pipe to engine to allow for easier access. You may find it better to remove more to give better access and visibility. Plug the inlet so nothing drops in! | 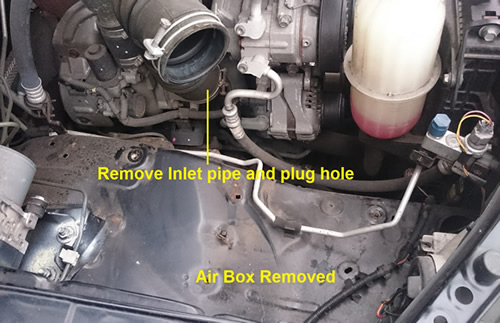 |
| Remove the fan belt - It’s worth taking a quick pic or doing a drawing before-hand so you know how the belt is routed around all those pulleys and idlers first! Then use a 14mm spanner on the tensioner pulley itself (sometimes linking two spanners gives you more leverage) and applying a “tightening” or clockwise rotation will release the tension so that you can remove the fan belt – careful, it’s a strong tensioner! | |
| Disconnect the alternator electrical plug by pressing on top to release it. | 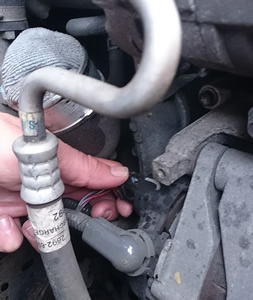 |
| Disconnect the main terminal wire using a 10mm spanner. | |
| Remove the idler pulley which may restrict removal of main alternator pivot bolt – be careful, there is a stepped washer between the pulley and engine that could drop if you are not aware it is there! |  |
| Remove the lower retaining bolt with a 12mm spanner. It’s underneath the alternator. You can’t really see this so it’s a case of feeling down until you feel the bolt head. You can check on the new alternator to see roughly where this is. Removing this bolt before the main pivot bolt will make life easier. | 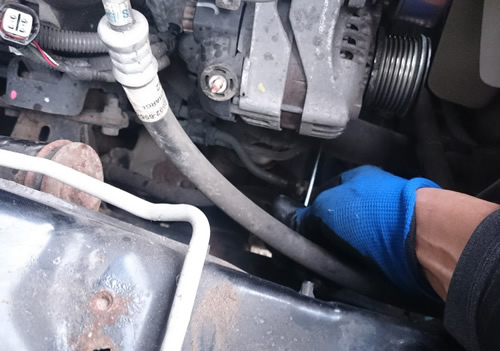 |
| Remove the alternator main pivot with a 14mm socket/spanner. | 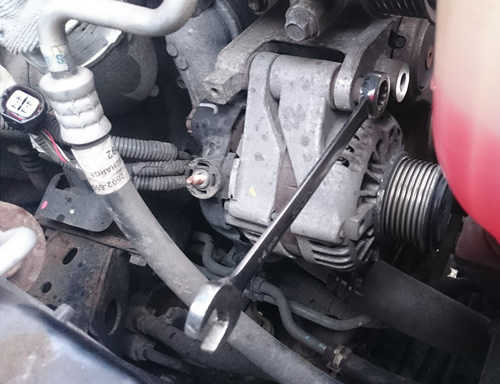 |
| Slide old alternator unit up past air-con pipes (if fitted). | |
| How to fit the new Alternator: | |
| Create an opening for the new alternator to fit - There is a steel collar inserted into the alloy retaining casting, you can tap this insert to the right to increase the size of the opening if required. | 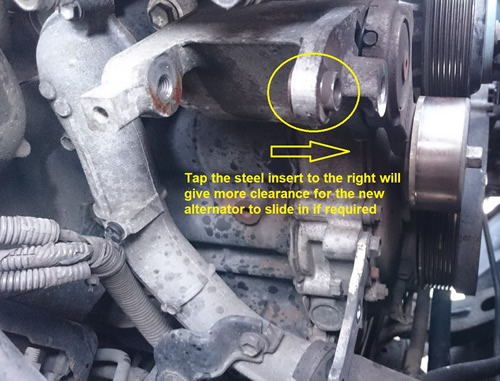 |
| Fit the new alternator in reverse order using the main upper pivot bolt 62Nm. | 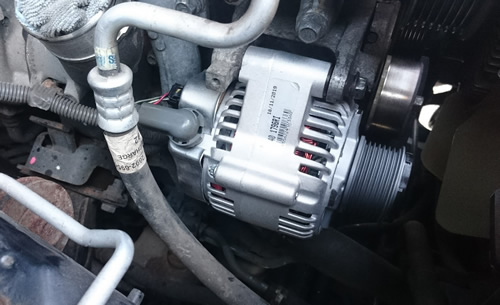 |
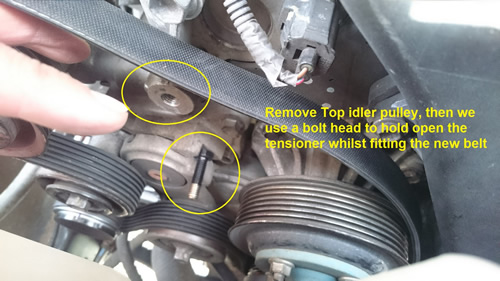
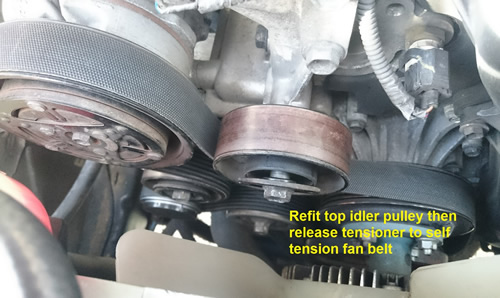
| Refit the fan belt - One of the biggest bug bearers of the job is refitting the fan belt – not so bad if you’ve tackled this before but a bit of pain for your first time! I guess there is no real easy way except taking your time. As a tip, I would personally advise removing the very top idler pulley (next to the air-con pump). You can then clearly see the spring-loaded tensioner pulley – this can be prised back using the 14mm spanner technique described earlier. Rather than fighting the tension to fit the belt, we actually insert a bolt head into the casing stops (a bolt like the one that holds in the air-box will do the trick - 12mm socket head) we have tried as best to show this in our images. Basically, this holds the tensioner open so that you can fit the belt and re-fit the idler pulley without trying to fight the tensioner. Don’t forget to remove the bolt that’s holding open the tensioner if you use this technique! |
  |
| Reconnect the Battery(s) after you have refitted all the components. Start and test the output – which should be between 13.2 to 14.8 volts with good batteries. | 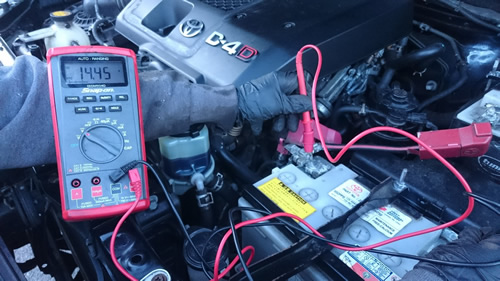 |
Replacing an alternator on the Hilux KUN25 & KUN26, if all goes well, should take around 1 to 1.5 hours.
Disclaimer: (sorry we have to put this bit in!)
As a disclaimer of liability, RoughTrax is not responsible for what customers do after using the site or any information provided in good faith. Any decisions you make after reading a blog post or other material are your responsibility and RoughTrax can’t be held liable for anything you choose to do with the information provided.
I hope this article helps you to understand the basics of changing your alternator.
All the best
Barry