 We have put together this basic step by step guide to replacing your Sump Pan. We have also included some photos which should make things easier to understand. There are of course other ways to replace the Sump but we have found this to be the easiest way. (The photos included are of a Toyota Hilux MK4 LN165.)
Useful Notes
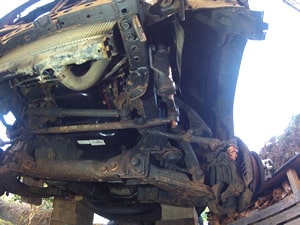
The following procedure minimises the work involved in replacing the sump pan and allows clear unrestricted access to the engine underside. The engine can also be run after fitting to check for correct sump sealing before replacing the front axle unit. Works are carried out from the vehicle underside from ramps/chassis support or a vehicle pit.
Before You Start
We found these items useful:
- Assorted split pins for steering joints
- Tie-wraps
- Hexagon sockets
- Emery cloth
- LED lighting
- Copper slip assembly grease
Instructions
-
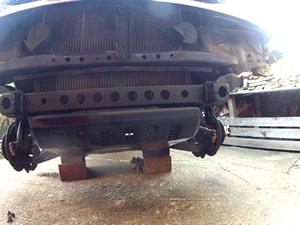
- Secure the vehicle and remove the front wheels.
- Remove the front bumper and plastics (Optional, but it gives more room and light).
- Remove the sump guard.
- Remove the steering linkage assembly complete with steering damper.
- Remove the CV coupling nuts on both sides
(NOTE - The bolt units are a splined fit and should not be turned). - Remove the bottom ball joint connection to both sides, wedge outward and secure the front drive shafts back with tie wraps
(NOTE- ensure flexible brake pipes are not strained). - Remove the front axle prop shaft bolts and secure them up to the anti-roll bar with a tie wrap.
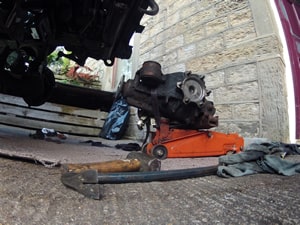
- Support the front axle and remove both of the rear flexible mounting through bolts and the four front cross member bolts and remove the front axle unit.
- Remove the bell housing small guard plate to allow access to the rear sump studs.
- Drain the sump and remove the level sender unit
(NOTE- secure the wiring for the sender up out of way using a tie wrap) - Remove the sump bolts and nuts
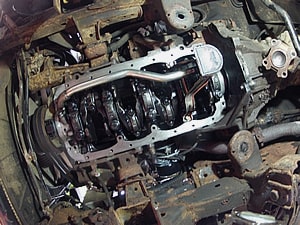
(NOTE-it requires a good quality small ratchet unit, we recommend using a hexagon socket). - Split the sump joint and the lower sump pan.
- Clean up the joint face using a wood chisel and emery cloth. Wipe it clean with solvent.
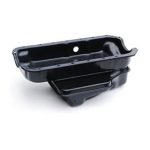
- Check the fitting of the new unit and emery cloth sealant surface on sump and clean with a solvent. Inspect the new unit for foreign objects within baffled areas before fitting.
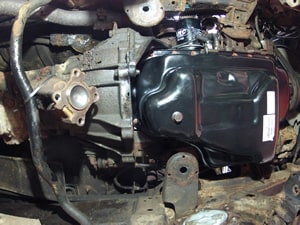
- Apply liquid sealant to the joint faces and re-fit the sump pan.
- Re-fit the level sender, drain plug and wiring.
- Replace the oil filter and fill it with oil after the sealant sets.
- Check for any engine obstructions and run the engine until warm.
- Inspect it for oil leaks.
- Re-fit all the components in reverse of the above.
- Conduct function tests and a road trial.
- Final inspection.
- Secure the vehicle and remove the front wheels.